
Takeover 2 Combos: Routes, Juggles and Score Chasing
How Takeover 2's combo chain works, how to turn a parry into a full punish, and the route templates that keep your hit counter and score alive.
Takeover 2's combo system rewards routing, not mashing. A parry counter is the cleanest starter, a launcher opens the juggle, and a finisher ends the sequence before the enemy can armour through it. Source: Takeover 2 on Steam ↗
Every arcade brawler says it has deep combat. Takeover 2's claim is narrower and more useful: it has a combo chain, a parry that starts offence, and a scoring layer that notices when you repeat yourself. The result is a game where the basic string is easy and the good route is a decision.
This page is about that decision. It uses the action names the game itself uses - punch, kick, jump, special, parry, finisher - rather than button notation, because Takeover 2 supports full remapping and the demo's layout changed during development. Learn the jobs, then bind them to whatever your hands prefer.
The four pieces of a Takeover 2 combo
1. The starter. The first hit that puts you in control. A parry counter is the best starter because the enemy is already stunned and you know exactly where they are. A jump-in or a weapon throw is the alternative when you need to close distance.
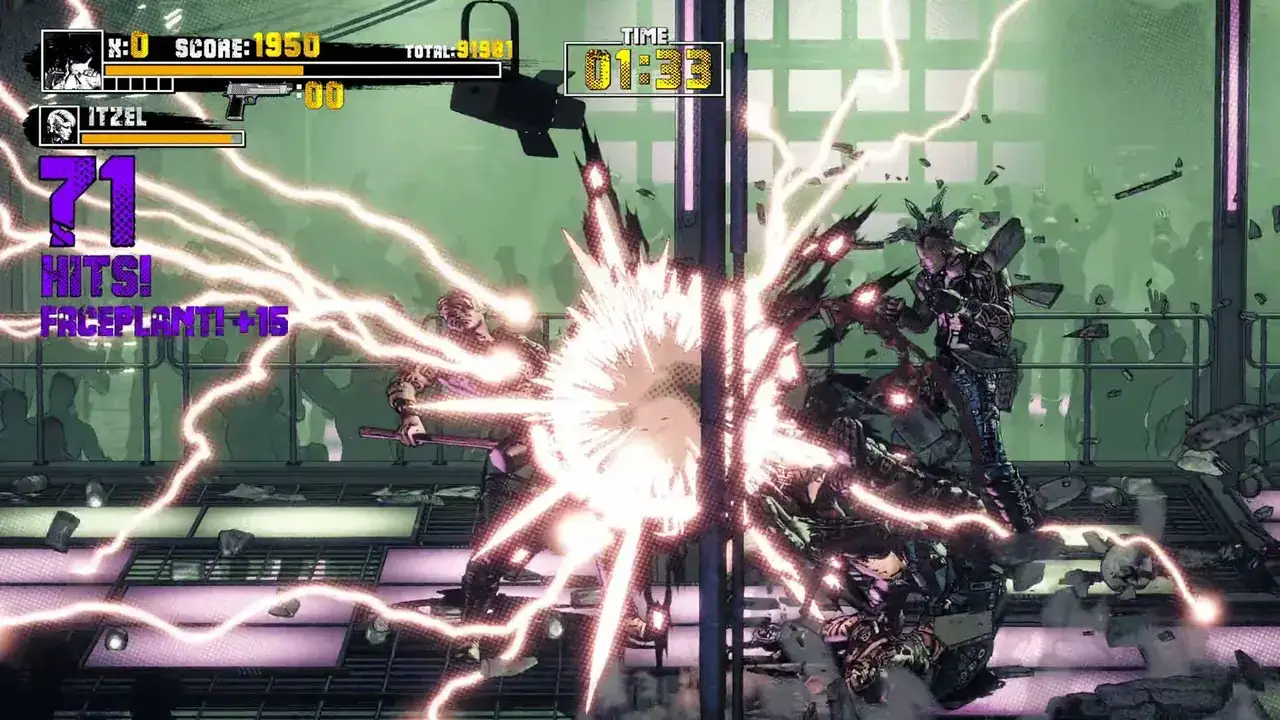
2. The chain. The punch and kick strings that carry the enemy across the screen. The HUD counts hits, and the score rises with variety and cleanliness. Repeating the same two-hit string is safe but scores poorly.
3. The launcher. The hit that lifts the enemy off the floor. This is where the combo becomes a juggle, and where most players leave damage on the table because they keep punching a body that is already in the air.
4. The finisher. The move that ends the sequence. Gun finishers, ground executions and special attacks all belong here. The mistake is using a finisher early, when the enemy still has enough health to survive and you have spent your best tool.
A route is just those four pieces in order. The quality comes from which starter you earn and whether the finisher is available when the chain ends.
Route templates that work
These are templates, not dial-a-combo strings. They assume you have earned the opening.
Parry into a full punish
Parry -> counter -> light chain -> launcher -> air juggle -> ground finisher.
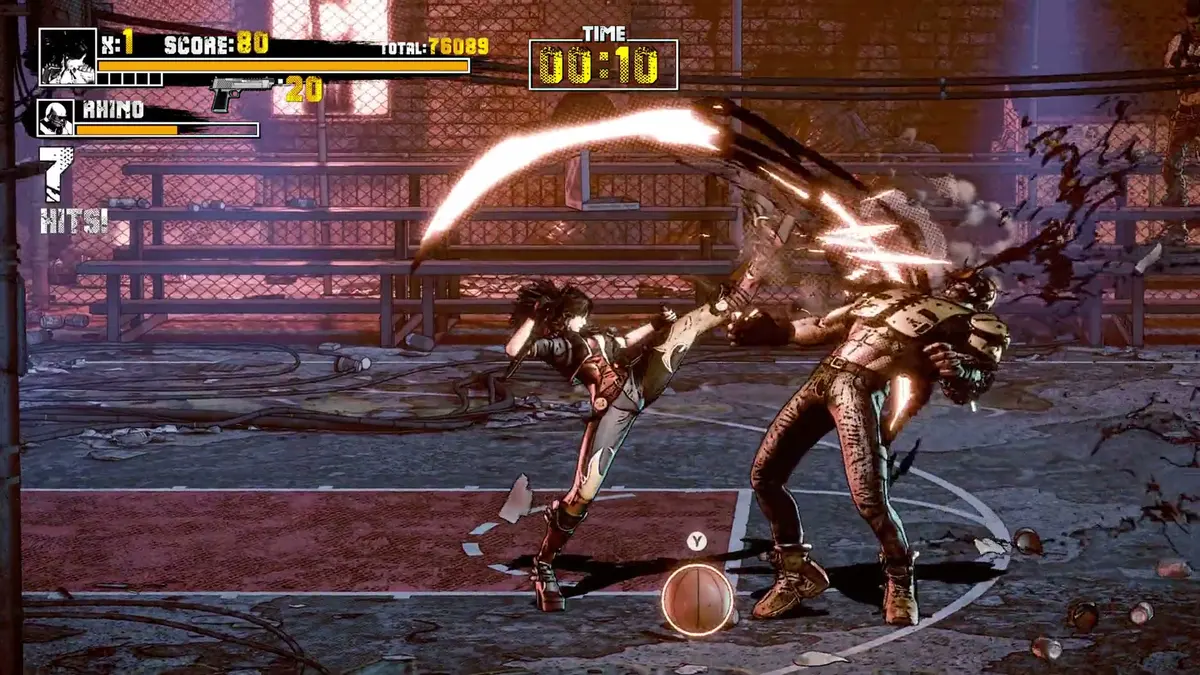
The parry counter is mapped to the punch button, so the transition from defence to offence is one input rather than a stance change. Land the counter, confirm two or three hits, then launch. If the enemy is near a wall, the juggle is shorter but the landing is more predictable; if they are mid-screen, you have more time to choose the finisher.
This is the route to practise first. It teaches the two most important habits in the game: stop attacking when the parry lands, and do not chase a juggle that has already ended.
Weapon opener into a crowd
Weapon throw -> dash -> heavy string -> knockdown -> reposition.
A thrown cone or tyre is not just damage. It buys you a turn. The enemy that was about to grab you is on the floor, and the ones behind them have to step around the body. Use the turn to put your back to a wall or to line up the next group. This is the crowd-control route, and it is more valuable than any single-target combo in a four-enemy wave.
Boss punishes
Parry -> counter -> two-hit confirm -> reset.
Bosses punish greed. The template above is deliberately short: take the counter, confirm enough damage to be worth the risk, then return to neutral. If you try to finish every punish with a launcher, you will eat the boss's next armoured move. The long combo is for the moment the boss is staggered, not for every parry.
Score route
Variety -> no damage -> finisher bonus -> fast clear.
The score system is not just a hit count. A stage rank rewards the whole performance, so a clean route with different moves beats a long route that repeats one string and takes a hit at the end. If you are chasing an S rank, treat damage taken as a bigger problem than combo length.
Character-specific routing
The four fighters share the system but not the range.
Ethan Rivers is the balanced martial artist. His trailer footage leans on spinning kicks and fire-trailed specials. He is the easiest character to learn the parry route with because his normals cover the distance a counter creates.
Megan Brooks mixes acrobatic kicks with gunplay. Her route wants to keep the enemy at the edge of kick range, then use the gun to finish. She is less about long juggles and more about controlling the space between you and the crowd.
Connor Grayson is the heavy. Firearms, big punches and a pipe in the trailer. His starters are slower, so his routes are shorter and more damaging; he wants one good parry, not three speculative ones.
Amy McKenna fights on roller skates. Her identity is motion: skating combos and flaming aerial kicks. She is the character most likely to turn a launcher into a crossing juggle, and the one most likely to overshoot the camera if you are careless.
If you are learning the system, start with Ethan. If you are chasing style, Amy. If you want the shortest route to damage, Connor.
Building the hit counter without padding
The HUD's hit counter is a score multiplier, not a goal in itself. Empty hits on a blocking enemy still count visually but do not build the same score, and a dropped chain resets the momentum. Three habits keep the counter honest:
- Confirm before you commit. Two hits that land are worth more than five that whiff.
- Use the environment between groups. A throw or a kickable object keeps the chain alive while you reposition.
- End on a finisher. The finisher is the punctuation. A chain that stops because the enemy died is a chain that left score on the table.
The "Flawless Flow" achievement asks for a stage clear without dropping the combo. That is not a trial of length; it is a trial of not taking bad fights. Walk past the group you cannot safely engage, isolate the shooter, and use the weapon stash before the boss door.
Practice drills
The demo includes a practice environment, and the full game's Practice mode (if present in your build) is the right place for these.
- Ten parries in a row. Do not counter. Just parry and reset. Learn the tell, not the punish.
- Parry into three-hit confirm. Add the counter and two normals, then stop. Repeat until the stop is automatic.
- Launcher into one air hit. Not a full juggle. One hit, then land. The goal is to learn the height.
- Weapon throw into a dash. Close the distance before the enemy recovers. This is the crowd-control drill.
- One full stage without taking a hit. Ignore score. Just survive cleanly. The S rank will follow.
The defensive half of the loop is covered in the parry timing guide→.
FAQ
What is the best combo in Takeover 2?
There is no single best string. The best route is parry counter into a short chain, a launcher into a juggle, and a finisher when the enemy is low. The exact moves depend on your character and the enemy type.
How do I start a combo after a parry?
The parry counter is mapped to the punch button in the demo build. Parry the committed attack, then press punch to counter. From there, confirm two or three hits before launching.
Does Takeover 2 reward long combos?
It rewards clean, varied routes and stage rank more than raw length. A short route with no damage and a finisher scores better than a long route that repeats one string and eats a hit.
Sources
- Takeover 2 on Steam ↗
- Steam news and combat patch notes ↗
- Takeover 2 reveal trailer breakdown ↗
- June 2026 press release ↗
Official source: Takeover 2 on Steam ↗ Takeover 2 guides and walkthroughs